Olivia's Fried Chicken

In a rather uncanny coincidence, just as I was sitting down to write about Martin Luther King Jr. and the Black Lives Matter protests, my friend Melanie asked me if I wanted to attend a soul food cooking class in Beijing taught by an American woman named Olivia. I jumped at the chance — I’ve heard a lot about Olivia and her cooking. Last Thursday, a dozen of expat spouses — from the United States, Jamaica, Bolivia, Italy, Australia, and Africa — filled a cooking studio and learned the secrets of fried chicken, biscuits, and mac and cheese. The fried chicken and biscuits were my favorites — and absolutely delectable served with a honey, butter, lemon sauce. There’s no translation for “soul food” in China quite yet, but I’m confident that we’ll be able to come up with some way to describe this delicious food in Chinese. Stay tuned for Olivia’s biscuit recipe later this week …

5 chicken thighs
2 cloves garlic
1 tbs paprika
1 tbs onion powder
1 tbs garlic powder
1 tsp salt
1 tsp black pepper
1 1/2 cups all purpose flour
3/4 cup buttermilk (or 3/4 cup milk and 1/8 cup white vinegar)
1/2 tsp cayenne pepper
Vegetable oil for frying
1/3 cup honey
4 tbs butter
1 lemon, juiced

Chop the chicken thighs into 2-inch pieces. Make sure they are not more than 1/2 an inch thick. Season the chicken with half of the quantity of each of the seasonings: garlic, onion powder, garlic powder, salt, pepper, cayenne pepper.

Add the buttermilk to the chicken and toss. Set aside in the fridge to marinate for 2-4 hours, or overnight.

Just before you are ready to begin frying, in a medium bowl mix flour with the remaining half of the seasonings (garlic, onion powder, garlic powder, salt, pepper, cayenne pepper).

In a small bowl, mix together honey, lemon juice, and butter.

Fill a large pot halfway up with vegetable oil and place over high heat. When the heat reaches 350 degrees Fahrenheit, dredge each piece of chicken in the flour and add place gently into the oil with tongs (or chopsticks). Fry in batches for 6-7 minutes, then drain on a wire rack before serving with honey, butter, and lemon sauce.

WechatIMG5.jpeg

The Secrets of My Fried Rice

shZ2quJJT2q+JpqnCmCn9Q.jpg

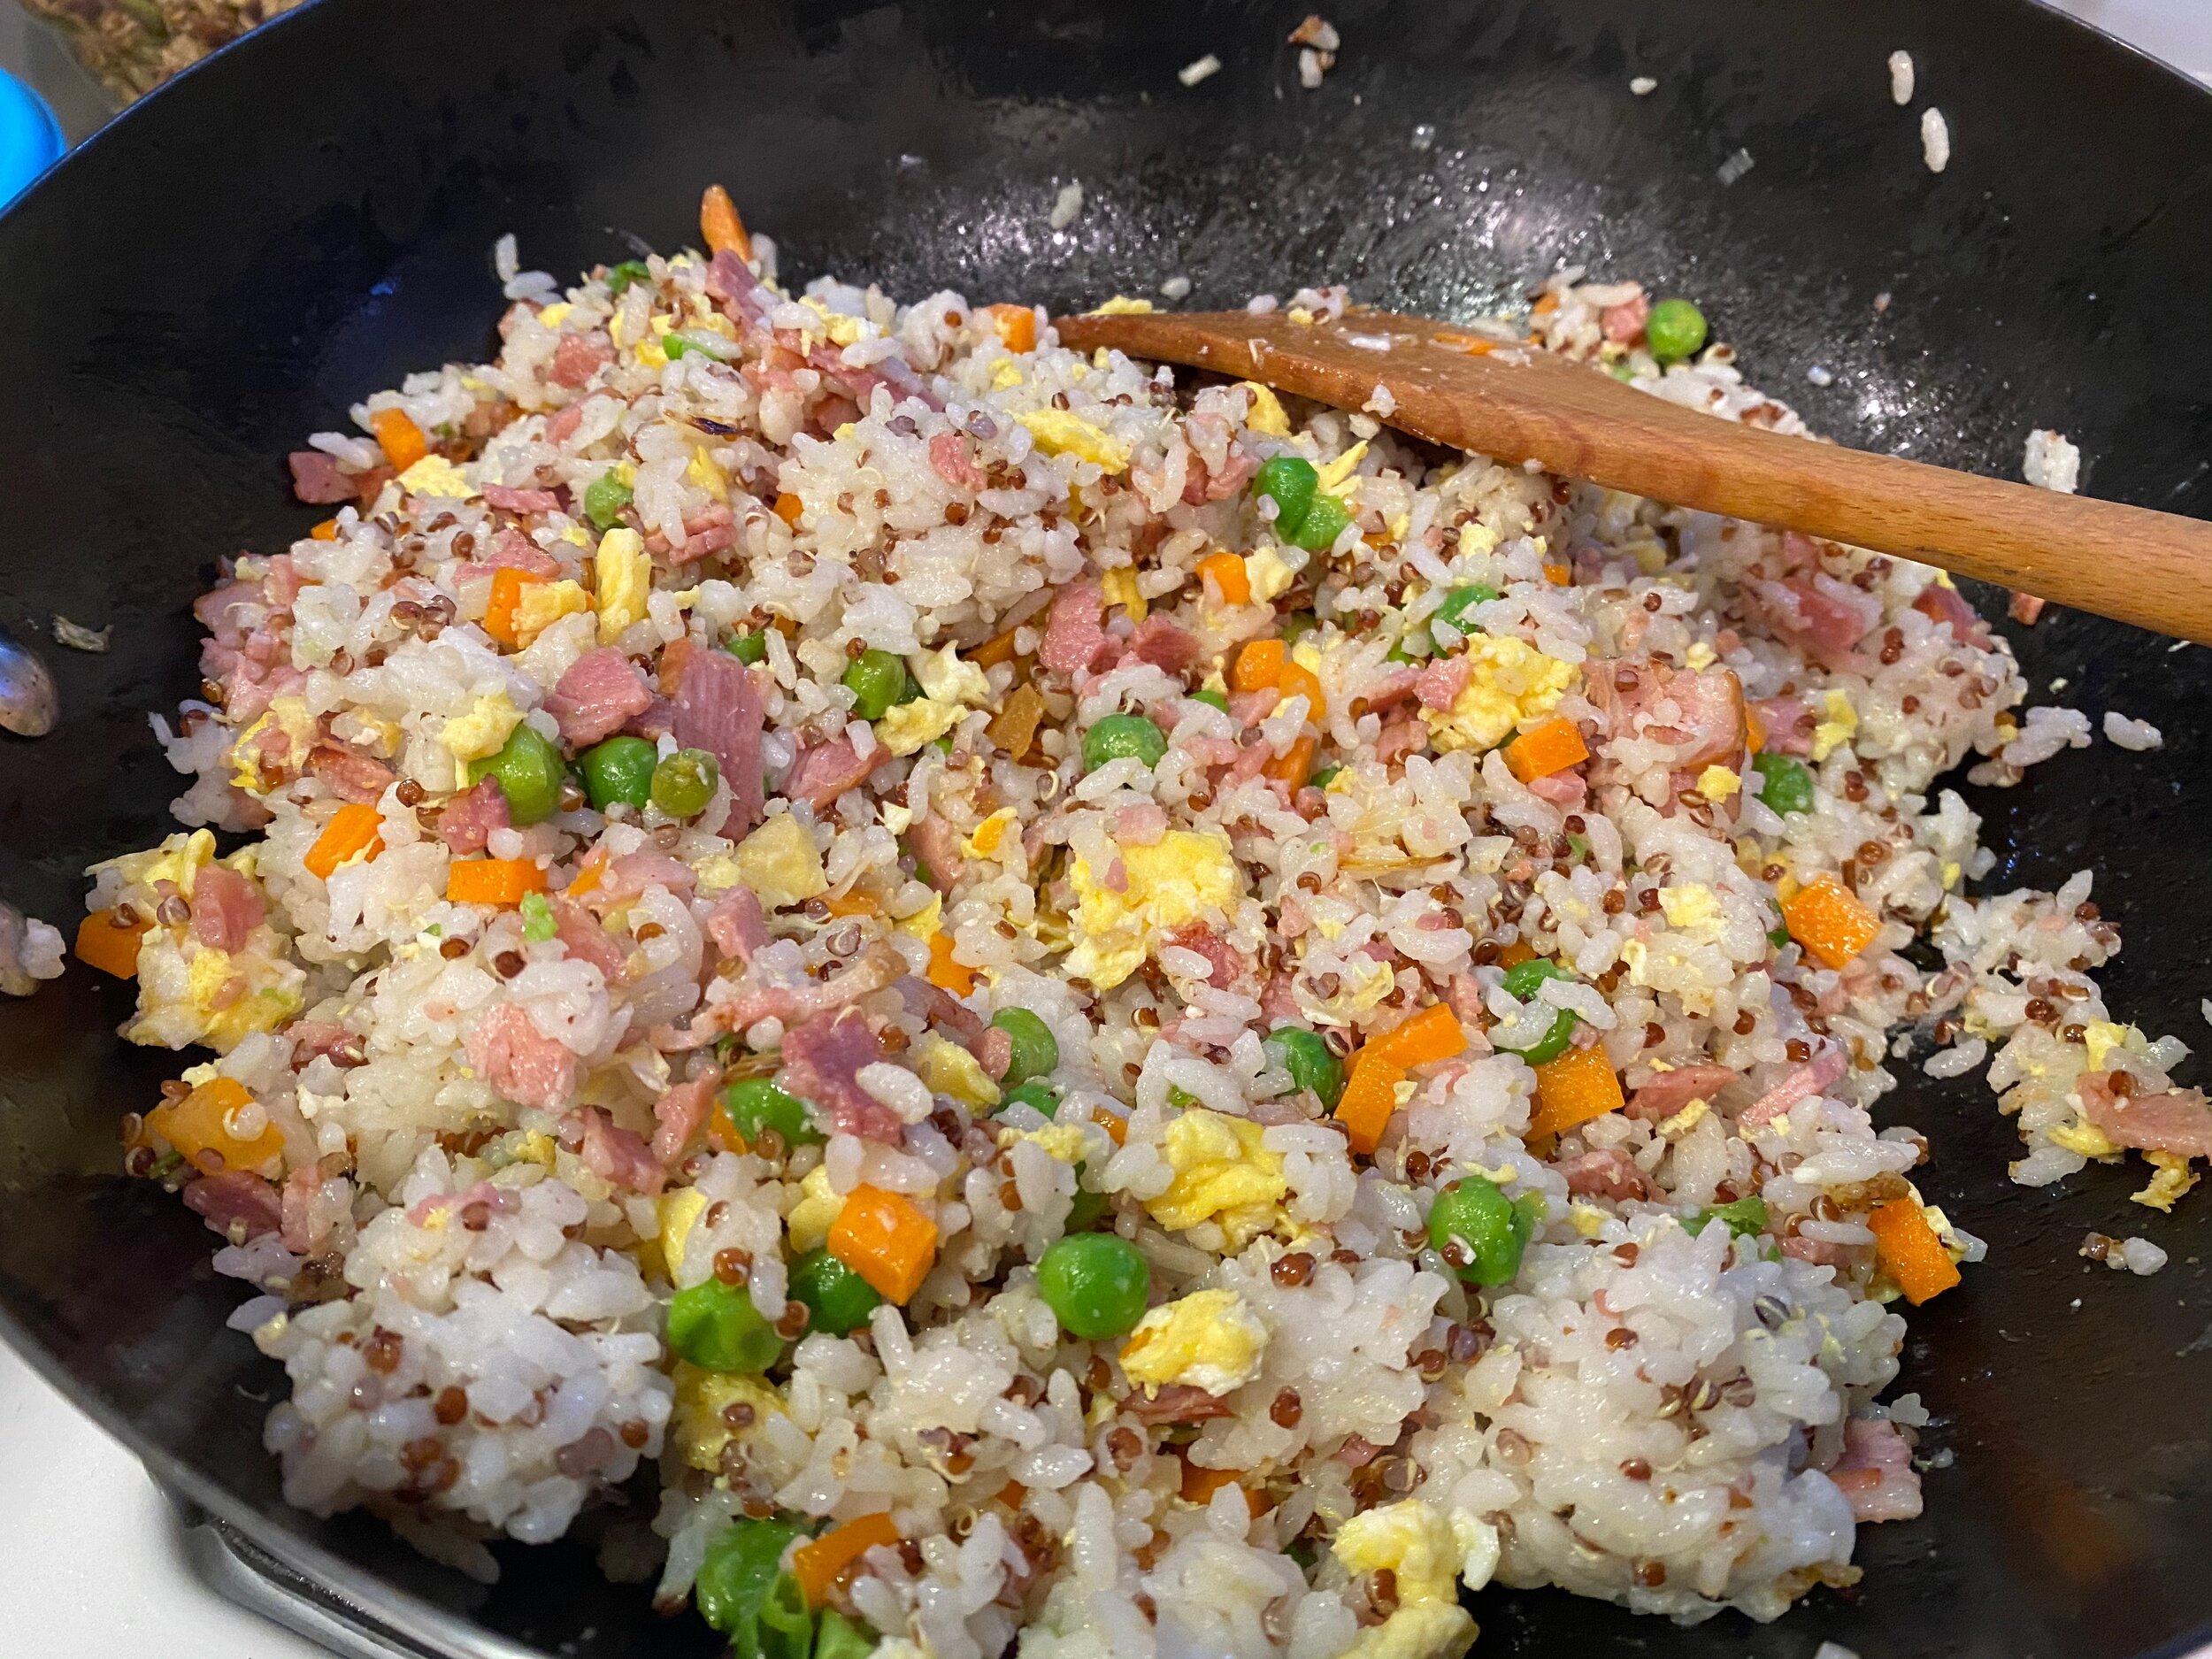
I’m very into noodles, as many of you know, but there’s a secret to all of this: my family is from southern China and Taiwan, where rice, not noodles, rule. I basically grew up on fried rice and I’ve passed on my love for this comfort dish to my children, who eat it at least once a week.

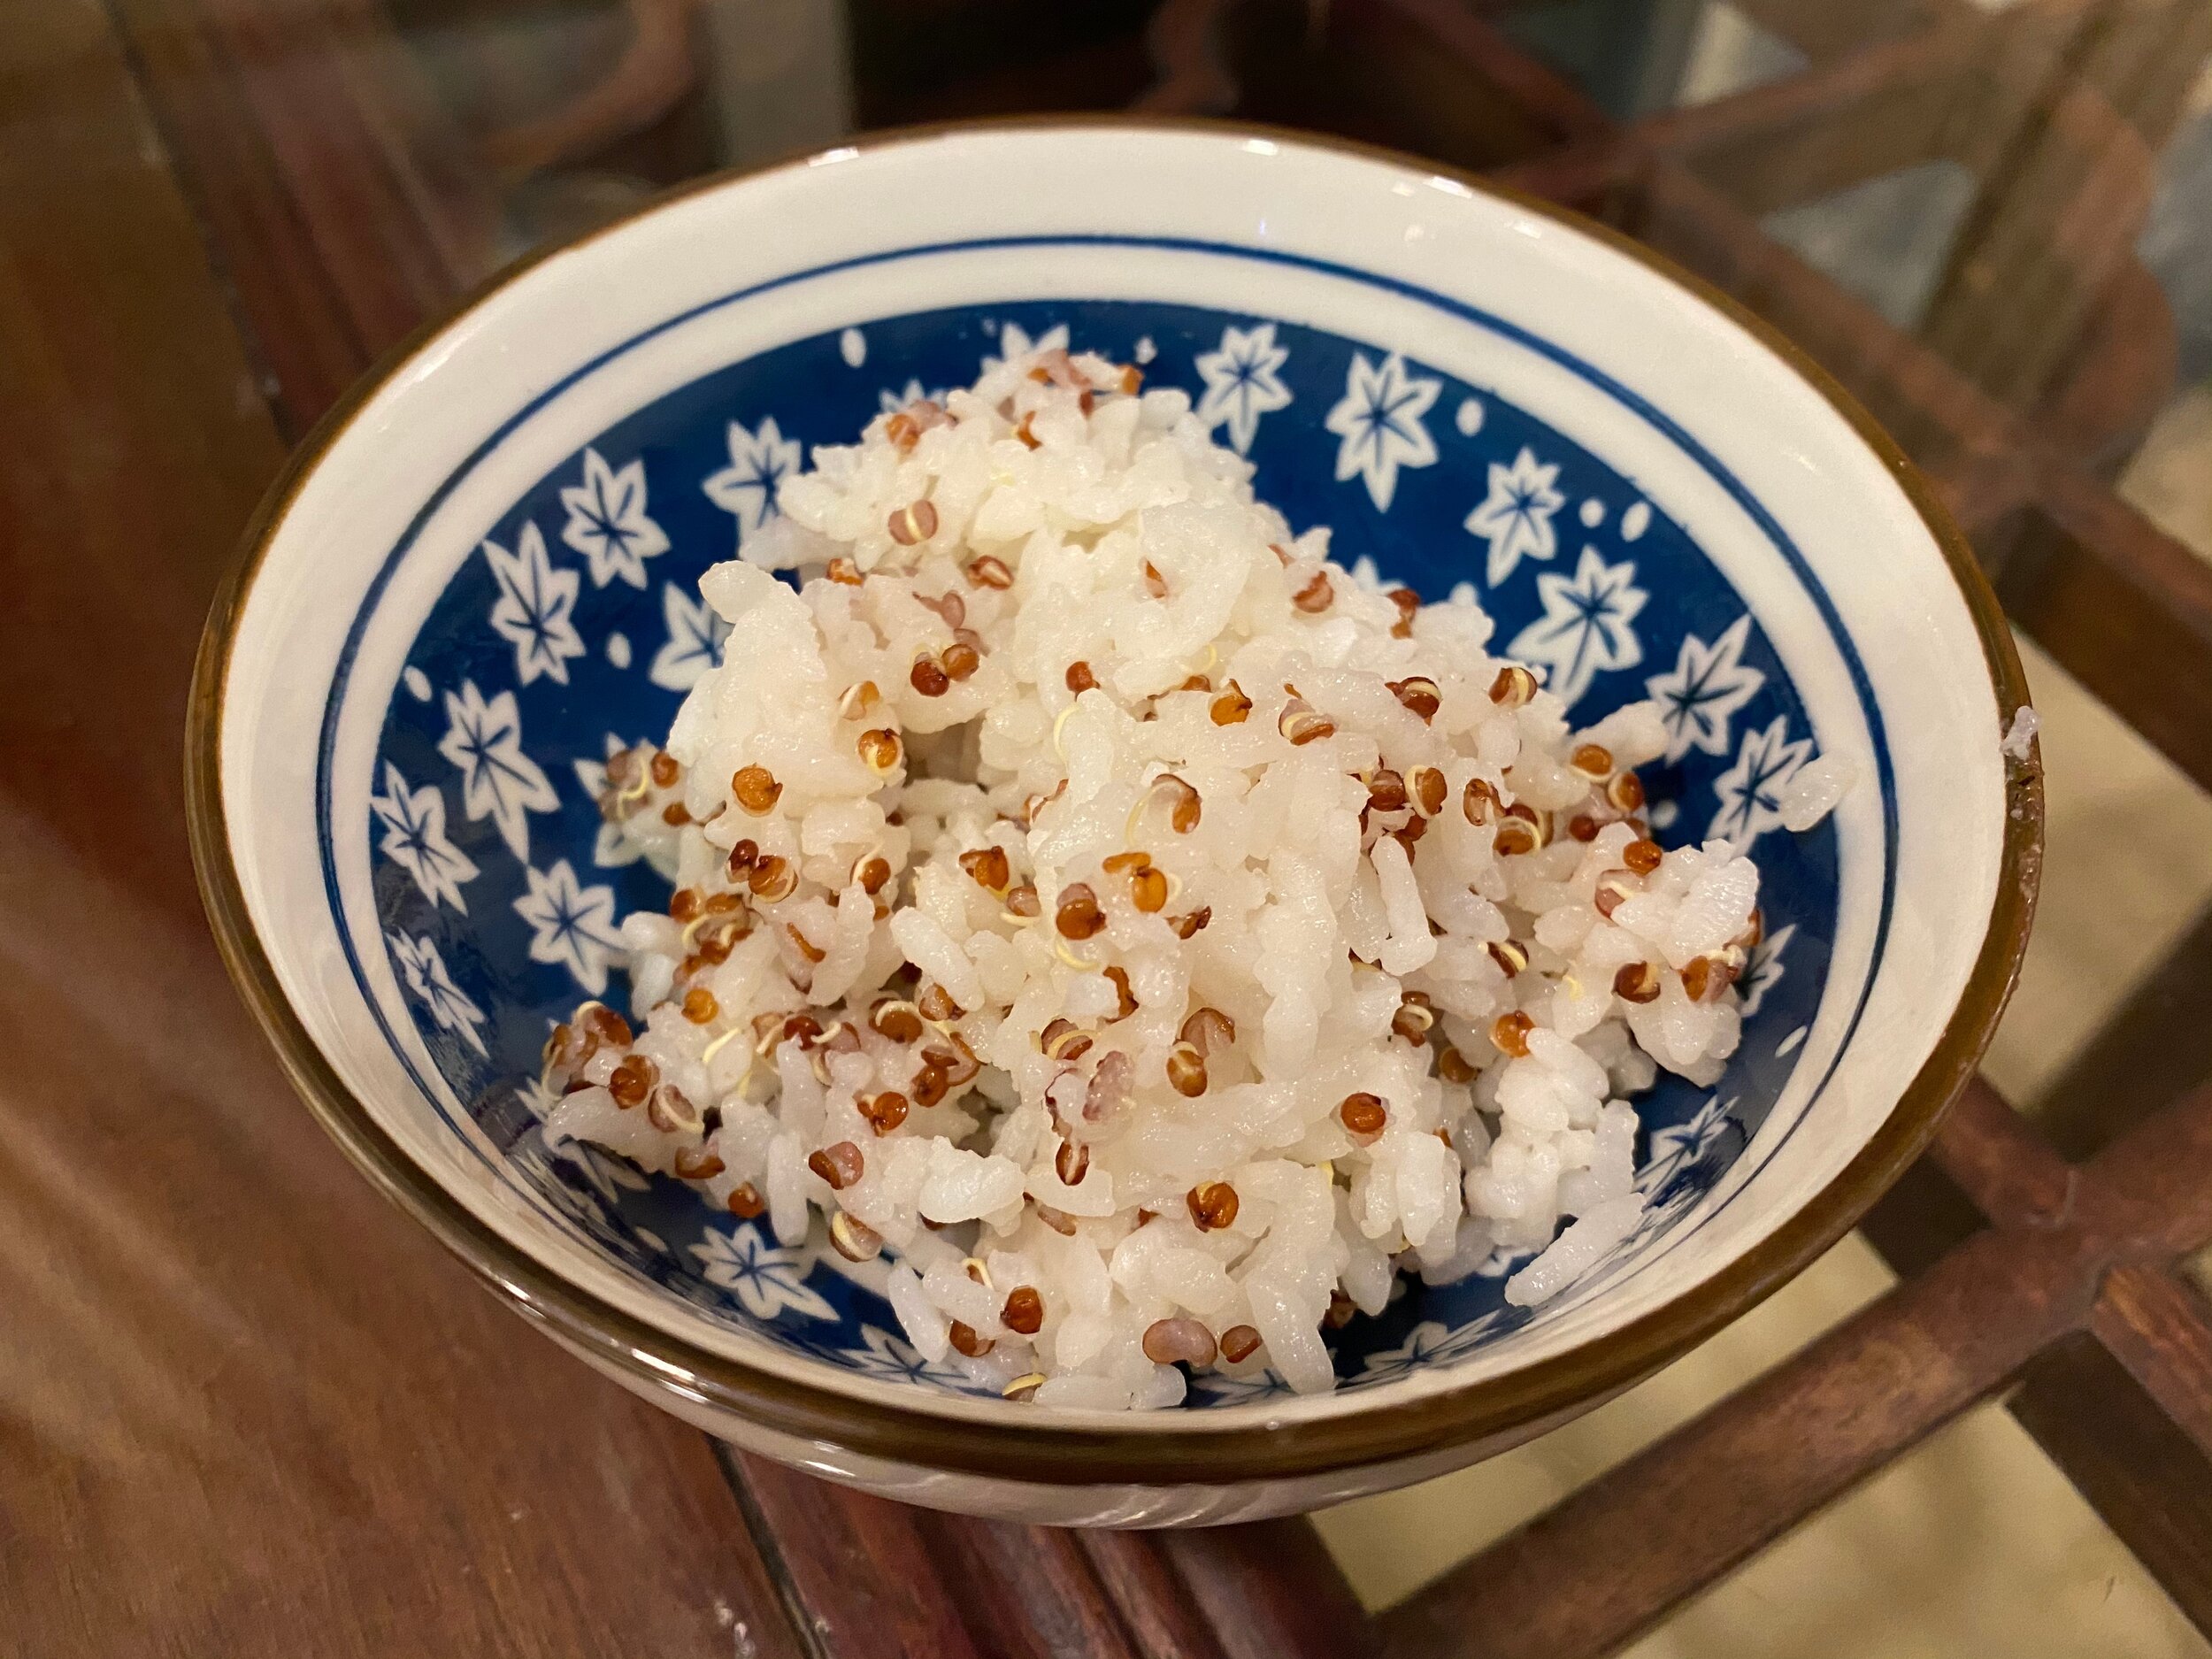
You can use white rice, brown rice, a mix, or something I like, steamed short-grain rice with quinoa. There are a couple of tricks to this dish — one is to use cold, leftover rice (ideally from a day or two before) and the second is squeezing some plain old American yellow mustard on it and mixing it in just before serving. It’s a trick my mother learned from a Chinese-American chef friend of hers, and a perfect example of how a traditional recipe can be improved with something totally foreign. 

Fried Rice

2 cups cold, leftover steamed rice (ideally from the day or two before)
2-3 scallions or 1 leek, white and green parts finely minced
4 eggs
1 medium carrot, finely diced
1/2 cup fresh or frozen and defrosted green peas or 1 long broccoli stem diced
1/2 lb worth of diced ham, shrimp, smoked tofu
Salt, to taste 
Black or white pepper, to taste 
3 tablespoons of cooking oil
1-2 tablespoons American yellow mustard

Break eggs into bowl, beat, and add ¼ tsp salt. 

Heat wok on high, add half the oil and wait for wok to heat for 1 minute. Add eggs and scramble until it sets. Remove from heat. 

Clean wok, heat on high, add the rest of the oil and scallions. Add protein and stir until cooked. Add vegetables. Add salt and pepper. Add rice and mix thoroughly. Add eggs. Taste and add more salt and pepper. Just before removing from heat, squeeze a tablespoon or two of mustard on the rice and mix thoroughly. Serve immediately. 

Wurau469TT6aPNhxw0+VCQ.jpg

How to Cook the Perfect Rice

bE6D6KUlS7OJ+2XGfcY+Kg.jpg

I’m going to teach a fried rice cooking class next week, but I thought I would back up a bit and start with talking about how to make rice. At first, it might seem like a pretty silly thing to talk about — especially with automatic rice cookers and InstantPots these days. But I’ve found that with my various moves around the world, getting rice right isn’t as easy as just pressing a button.

For one thing, different rices (short grain, long grain, brown, jasmine) each have slightly different cooking times and different requirements for the rice-to-water ratio. Growing up in a Chinese household, I learned the old imprecise “knuckle” trick: place the rice in the cooking vessel and enough water so that it goes up to your first knuckle. The problem with that is that everyone’s knuckle is a different size.

Also, different methods of cooking (on the stovetop, in an InstantPot, in an old fashioned rice cooker, in an automatic rice cooker) all require slightly different amounts of water.

So my first piece of advice is to first decide on a one type, and ideally one brand, of rice and stick with it. And then find a cooking method and stick to that too.

My two favorite types of rice to use are short-grain Dongbei rice, from China’s northeastern border near Korea, and Jasmine rice. I use a fully automatic rice cooker, though if I’m cooking a particularly large batch of rice, I use the InstantPot.

Once you’ve settled on the rice, decide how much you need to cook of it — I usually start with 2 cups of uncooked rice for my family of 4, which nearly doubles in size and leaves a little leftover rice for the next day.

I wash my rice by placing it in a large container with a lid (an old quart-size yogurt container will do) and adding water. Close the container and shake it. Pour out the rice into a sieve and rinse out the remaining granules with some water. Chinese steamed rice does not need to the washed and rinse multiple times, as that reduces the stickiness of your final product.

Now add water — but you will have to figure out exactly the right amount over 2-3 batches. Using the same type of rice and cooking method allows you to play with the rice to water ratio, which varies between 1:1 to 1:1 1/4. Add 1 1/4 cups of water if your rice cooking method is on the stovetop or a rice cooker that allows the steam to escape. Use 1 cup of water + 2 tablespoons if you’re using an InstantPot or other device that completely seals. Place the rice and water in your cooking container, close the lid and steam away.

By the way, there is no need for a fancy rice cooker to make rice: stovetop rice is super easy, though it requires a little monitoring. Place the rice and water in a medium saucepan, cover, and bring to a boil. Reduce to a simmer and cook until nearly all the water evaporates, about 15 minutes. It is also easier to control the stickiness of stovetop rice, as if it’s too wet, you can recover it and allow it to simmer for another minute or two.

These days, to make my rice a little more interesting, I add red or multi-colored quinoa to white rice. I use 1/4 cup of quinoa and 3/4 cup of white rice and cook it with 1 1/4 cups of water in my automatic rice cooker.

And it comes out perfectly each time.

Mom’s Easy Steamed Cod (or Sea Bass)

slPw+rBGQ9mSAlZDPjGerw.jpg

Mom’s Easy Steamed Cod (or Sea Bass)
Serves 4

1 1/2 lb cod or sea bass fillets (preferably wild caught, and ideally with skin on)
1 scallion, sliced into diagonal 1 to 2 inch slivers
2 tbs soy sauce (preferably Lee Kum Kee Seasoned Soy Sauce for Seafood)
1 tbs mirin (optional)
1 tbs sesame oil

Place the fish in a microwavable glass dish. Top with the rest of the ingredients. Cover with plastic or a microwaveable lid. Poke a small hole in the plastic or place the lid slightly askew to allow a small amount of steam to escape. Microwave for 5-6 minutes, until the fish turns opaque. Serve immediately.

"Meet Fresh" Style Taiwanese Shaved Ice 台湾冰沙

fullsizeoutput_6912.jpeg

One of the things I love about being back in Beijing is going to Meet Fresh, a nearby dessert shop that serves Taiwanese shaved ice. We had the shop deliver their desserts three times when we were in quarantine. After being cooped up in our home for the first 14 days upon our arrival in China, one of the first places we headed to was Meet Fresh.

To the average American, this dessert is pretty exotic and foreign. You get a big pile of ice flavored with brown sugar, topped with strange things, some of them quite chewy. When two of our closest friends from Washington D.C. visited us a couple of years back, we excitedly brought them to the shop. They took one look, said, “no thanks,” and headed for the door. When I recently ordered it for a friend and had it delivered to his home in Beijing, he messaged me. “Wow. Weird. Wacky. But SO good.”

So some of you out there will know what I’m talking about when I say I LOVE this stuff. When I visited my cousin in Chicago, he and his amazing wife took his kids and mine and me to his local Meet Fresh, not knowing that we were already fans. When we were in pandemic exile in the States for the first half of the year, I missed this dessert so much that I bought a hand-crank shaved ice maker on Amazon so my kids and I could make it from scratch. When my in-laws came down from Massachusetts, they gave the ice maker a whirl and tried the dessert for the first time. They’re now converts too.

I admit that this recipe below sounds a bit like some kind of Willy Wonka creation, but give it a try. Some of the toppings, especially the red bean and the grass jelly might seem foreign to many Americans. It’s a gelatin made from an herb related to mint family and has a mild, slightly medicinal flavor. In the States, you can find it in a can in Asian supermarkets. It’s delicious. However, when I was a kid, my mother once packed a container of grass jelly for school lunch; the kids took one look and said, “Ew! You’re eating tadpoles.” Suffice to say I never brought grass jelly to school again.

Allow some time for the cooking of the beans and the tapioca balls; you can cook them earlier in the day, refrigerate, and take it out of the fridge before you start shaving the ice.

This isn’t an exact recipe, but it’s something close to what you’ll get at Meet Fresh, which started in Taiwan but now has locations in the United States, Australia, and Asia. Or if you’re lucky enough to live near one of their outlets, visit them for a taste of the real thing.

Taiwanese Shaved Ice

two dozen ice cubes
shaved ice maker
1 cup brown sugar
1 cup hot water
condensed milk
1 cup dried Chinese red beans
1 cup pearl tapioca
1 can grass jelly (optional)
3 tbs white granulated sugar

Place the red beans in a medium saucepan with 2 cups of water. Bring to a boil and simmer for 30 minutes to an hour, until softened. Cook the pearl tapioca according to the directions; usually you boil a few cups of water first, then add the tapioca and cook for 5-10 minutes. The pearl tapioca should be chewy, not hard. Drain the beans and the tapioca and place in separate containers. Add a tablespoon of sugar to each container and set aside or refrigerate.

If using grass jelly, dice it into small cubes.

In a separate cup or bowl, mix the brown sugar and hot water until the brown sugar is fully dissolved. Cool in fridge or add an ice cube or two to bring it down to room temperature or cooler.

Shave the ice. Divide into two large bowls. Top with your desired quantity of red beans, tapioca, and grass jelly. Spoon the brown sugar syrup over your creation, along with generous drizzles of condensed milk. Serve immediately.

fullsizeoutput_6763.jpeg

Millet Congee with Pork Floss 小米粥和肉松

encPj9EqScKnZsnhZzVpYg.jpg

“Cereal??? Again for breakfast?” my daughter complained to me the other day. I don’t blame her. I’m not a cereal fan myself. And with all of our routines kind of a mess these days, it’s important to start the day right.

Thank goodness we’re back in China, where there are plenty of unusual options for breakfast. Noodles, for one, are allowed, as are any savory leftovers from the day before. Yes, most Chinese breakfasts are pretty much afterthoughts, but I think a country’s food culture can be judged on how much emphasis the country puts on breakfast. Countries with outstanding breakfasts — think England or Germany — generally aren’t known for their lunches or dinners. China, on the other hand, has probably one of the worst breakfast cultures in the world, but the rest of the cuisine is pretty darn good!

China still has some alluring breakfast foods, which I’ll detail occasionally on this blog. For one, there’s this congee. Served plain, it can be pretty boring, but with additions and toppings, it’s like a good bowl of savory oatmeal. And it can be served for breakfast, lunch, or dinner, or anytime in between. Millet makes the congee healthier and heartier than the typical congee, which are usually made of white rice. Think of millet as the Chinese version of steel cut oats.

yEwO92NcTY2oSDtkJyo8Cw.jpg

There are lots of ingredients you can add to congee, but my children’s favorite is pork floss, a savory-sweet snack you can eat right out of the jar. Here in Beijing, I pushed a few buttons on my phone the other day, and in thirty minutes, a delivery guy showed up in front of my house with a jar of pork floss from the nearby Singaporean beef jerky vendor called Bee Cheng Hiang. In the States and abroad, pork floss can be found in Asian markets or online. It’s kind of an ethereal cloud-like version of jerky and nowadays in China, it seems to top everything, from sweet baked goods to French fries.

Millet Congee with Pork Floss
1 cup millet
4 cups water
pork floss, to taste
Optional garnish: Japanese rice seasoning, and/or scallions

Place the millet and water in a medium-sized pot, rice cooker, or Instant Pot. If using a rice cooker or Instant Pot, chose the porridge function. If cooking stovetop, bring the millet to a boil and simmer for 20-30 minutes, until tender. The mixture should be slightly soupy and not too dense. (If too thick, add a little water and cook for a few more minutes.)

Serve immediately with pork floss, and add an optional garnish of Japanese rice seasoning and/or scallions.

Cold Peanut Sesame Noodles 花生芝麻凉面

This is always a hit with friends and my kids, and it’s very easy to make. In China, I make this sauce with just sesame paste, a delicious sauce that’s freshly pressed from white sesame seeds — you could call it “sesame butter.” In the States and elsewhere, it’s hard to find good sesame paste and it’s better not to substitute tahini, which is a little too bitter in these quantities. So I’d recommend trying to locate the paste at your local Asian grocer or on Amazon, or substituting good quality peanut butter.

Peanut Sesame Noodles
Serves 4

1 package Italian spaghetti or Chinese noodles, dried or fresh
1/2 cup of julienned cucumber (English or baby variety preferred)
1/3 cup of good-quality, no sugar added peanut butter
1/3 cup of Chinese sesame paste (if you don’t have Chinese sesame paste, don’t substitute tahini but you may double the quantity of peanut butter)
1 tbs white granulated sugar (if your peanut butter already has sugar in it, omit)
1/2 cup hot water
1/2 cup soy sauce
1/4 cup sesame oil
2-3 cloves garlic, minced
1 tsp fresh ginger, minced
Optional garnish:
1 tbs green part of scallions, chopped
1 tsp ground chili or chili flakes

Cook the Pasta/Noodles
Cook the pasta/noodles according to the directions provided on the box/package. 

Make the Sauce
Place the peanut butter and sesame paste in a large bowl and use a whisk to mix in hot water, little by little, stirring in one direction. Add the soy sauce, sesame oil, sugar, garlic, and ginger, and stir until well-blended. Add the pasta/noodles and cucumbers and mix, using chopsticks or tongs. Garnish with the scallions.

Serve at room temperature or refrigerate for 1 hour and serve cold! 

Peanut sesame noodles.jpeg

Smashed Cucumber Salad 拍黄瓜

This recipe uses a fun Chinese technique — “pai” or smashing — to impart more flavor to the cucumbers. (It’s also a great stress reliever.) The uneven ridges the smashing technique creates allow the marinade to seep into deep corners of the cucumber. It’s handy to have a big cleaver for this technique, or In a pinch, a mallet or a frying pan will do.

I wasn’t a huge fan of cucumbers until I came to China and found — all of things — English cucumbers. They look ugly — long and spindly with little bumps on them — but are crisp, flavorful and far better than their watery American cousins.

IMG_0638.JPG

Smashed Cucumber Salad
Serves 4 as an appetizer

2 large English cucumbers (or 4 baby/Persian cucumbers)
2 garlic cloves, minced
1 tbs chopped scallion or leek
1 tbs black Shanxi vinegar (or rice vinegar)
1 tbs soy sauce
1 tbs sesame oil
salt & white pepper to taste
coriander, chopped, to taste

Smash the cucumbers

Cut the ends off the cucumber. Cut the cucumbers into 2-inch sections. Place the cucumber on the chopping board. Using the flat side of a cleaver (or a mallet or frying pan), lightly smash the cucumbers so they split into smaller, ridged pieces.

Holding the cleaver at a 45-­degree angle, cut the cucumber into 1 inch diagonal slices.

Dress the cucumbers

Place the cucumbers in a medium bowl and toss with the rest of the ingredients. The cucumbers can be served immediately or placed in the fridge for an hour before serving (for better flavor).